Interface
GuardedID has a simple interface which does not typically require any interaction from the user. Once GuardedID has been installed and activated, it defaults to silently launch its protection services every time you restart your computer and/or sign-in to your Windows account.
To learn more about GuardedID's interface, continue reading below.
Taskbar Icons
The GuardedID taskbar icon ![]() serves as a status indicator of the current operational state of GuardedID which will display additional information when you hover your mouse over it. Descriptions of the possible operational states of GuardedID are listed below:
serves as a status indicator of the current operational state of GuardedID which will display additional information when you hover your mouse over it. Descriptions of the possible operational states of GuardedID are listed below:
| Enabled |
GuardedID is currently activated and enabled.
|
| Disabled |
GuardedID is currently disabled.
|
| Unavailable |
GuardedID's keystroke encryption protection is not available for the application you are currently typing in.
|
| Activation Required |
GuardedID is not currently activated with a valid Activation Key.
Important Note
GuardedID must be activated with a valid Activation Key before it can be enabled. If you have not already done so, activate GuardedID by following the instructions within Activation. |
| Error |
GuardedID has encountered an error which is preventing it from functioning properly.
|
Taskbar Icon Context Menu (Right-Click Menu)
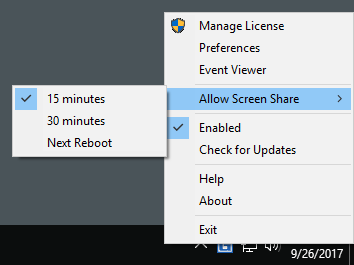
You can right-click the GuardedID taskbar icon ![]() to access the GuardedID context menu which is seen and explained below:
to access the GuardedID context menu which is seen and explained below:

| Manage License | This option opens the GuardedID License Manager window which can be used to activate GuardedID with a valid Activation Key, deactivate GuardedID from your current computer, and/or update your contact information. |
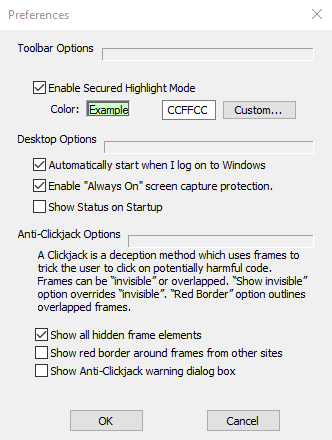
| Preferences |
This option opens the GuardedID Preferences menu which gives you access to the options listed below:

|
| Event Viewer | This option opens the built-in Windows Event Viewer application for the purposes of troubleshooting any potential issues with GuardedID. |
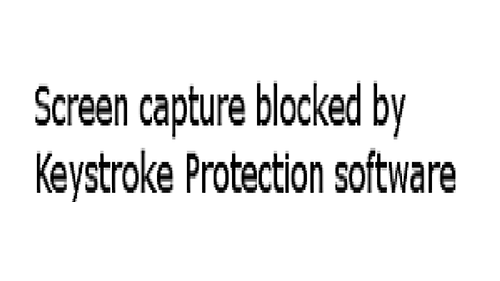
| Allow Screen Share | If you have "Always On" screen capture protection enabled in GuardedID's Preferences menu, this option allows you to temporarily allow applications to capture your screen contents for durations of 15 minutes, 30 minutes, or until you restart your computer. |
| Enabled | To enable GuardedID, click this Enabled option so that it displays a checkmark. To disable GuardedID, click this Enabled option so that it does not display a checkmark. |
| Check for Updates |
This option forces GuardedID to immediately check for any available program updates. If an available update is found, you will be prompted to download/install it.
GuardedID automatically checks for updates periodically regardless of whether or not you manually check for updates. |
| Help | The Help option launches your default internet browser which then displays this current GuardedID documentation for your future reference. |
| About | The About option opens the GuardedID About window which displays some technical information about your currently installed version of GuardedID. |
| Exit | Clicking Exit allows you to immediately quit the GuardedID application from running. If GuardedID exited in this manner, you must manually relaunch the GuardedID application (C:\Program Files (x86)\SFT\GuardedID\GIDD.exe) or restart your computer if you have GuardedID set to automatically start itself upon computer restarts. |

